Pre-requisites:
- You have an account on the NeLS system.
- You are a member of a NeLS-enabled project.
- You have created an ISA structure, or have “edit” permissions for an assay in that project.
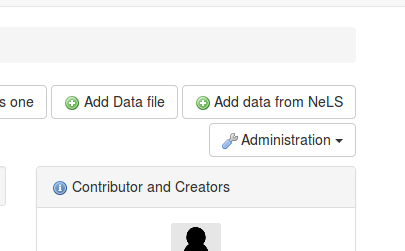
When viewing an assay in SEEK, if you have “edit” permissions, and the assay is part of a project affiliated with NeLS, you will see a button to “Add data from NeLS”.
Clicking this button will redirect you to the NeLS and ask you to authenticate. This step may be skipped if you have already authenticated in the recent past.
After authenticating with NeLS, you will return to the SEEK interface and see the NeLS browser.
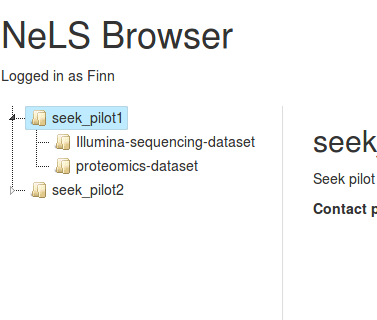
In the left-hand pane, you should see a directory-like list of NeLS projects. If there are no projects listed, you may need to contact NeLS administrators to request access.
Clicking on a project will show information about the project in the right-hand pane.
Double clicking on a project will show the datasets belonging to that project in the left-hand pane.
Clicking on a dataset will show information about the dataset in the right-hand pane, as well as a list of subtypes.
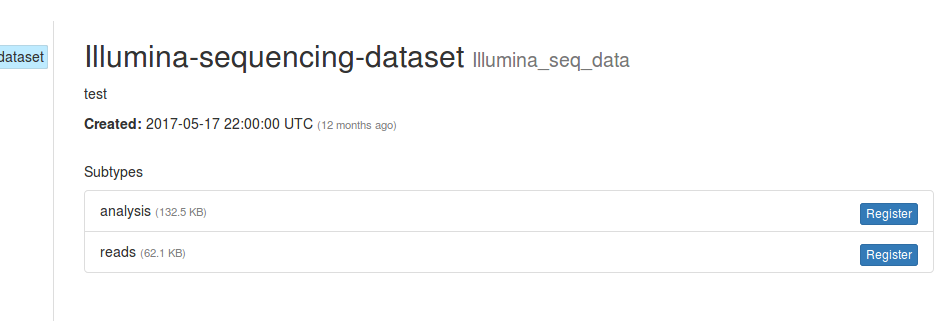
Clicking the “Register” button on a subtype will open a form where you can provide additional information about the data being registered.
Upon completing the form and clicking “Create”, the data will be registered in SEEK, and you will be redirected to the entry.
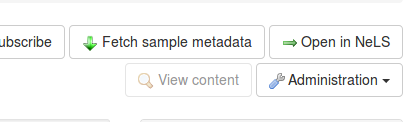
When viewing NeLS data in SEEK, two additional buttons are present on the top right of the entry page:
- Fetch sample metadata - If there is a sample metadata spreadsheet registered for this subtype in NeLS, click this button to import it into SEEK as samples (only visible if you have “edit” permissions)
- Open in NeLS - View the data in NeLS, prompting for login details if required.
Importing Sample Metadata
Clicking the “Fetch sample metadata” button will immediately import the appropriate sample metadata spreadsheet into SEEK, and begin a background task to extract SEEK samples from it.
If a “data” sheet was present in the sample metadata spreadsheet, the contents of that sheet will be displayed in an expandable panel as shown in the screenshot below. This information is presented to make it easy to locate the appropriate file in NeLS for a given sample.
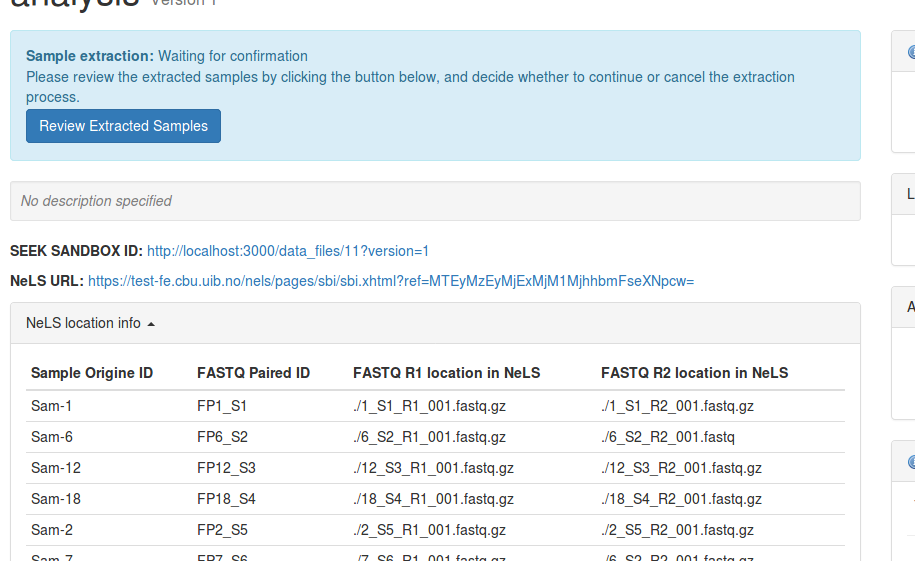
To complete the sample import process, click the “Review Extract Samples” button when the background task has finished.
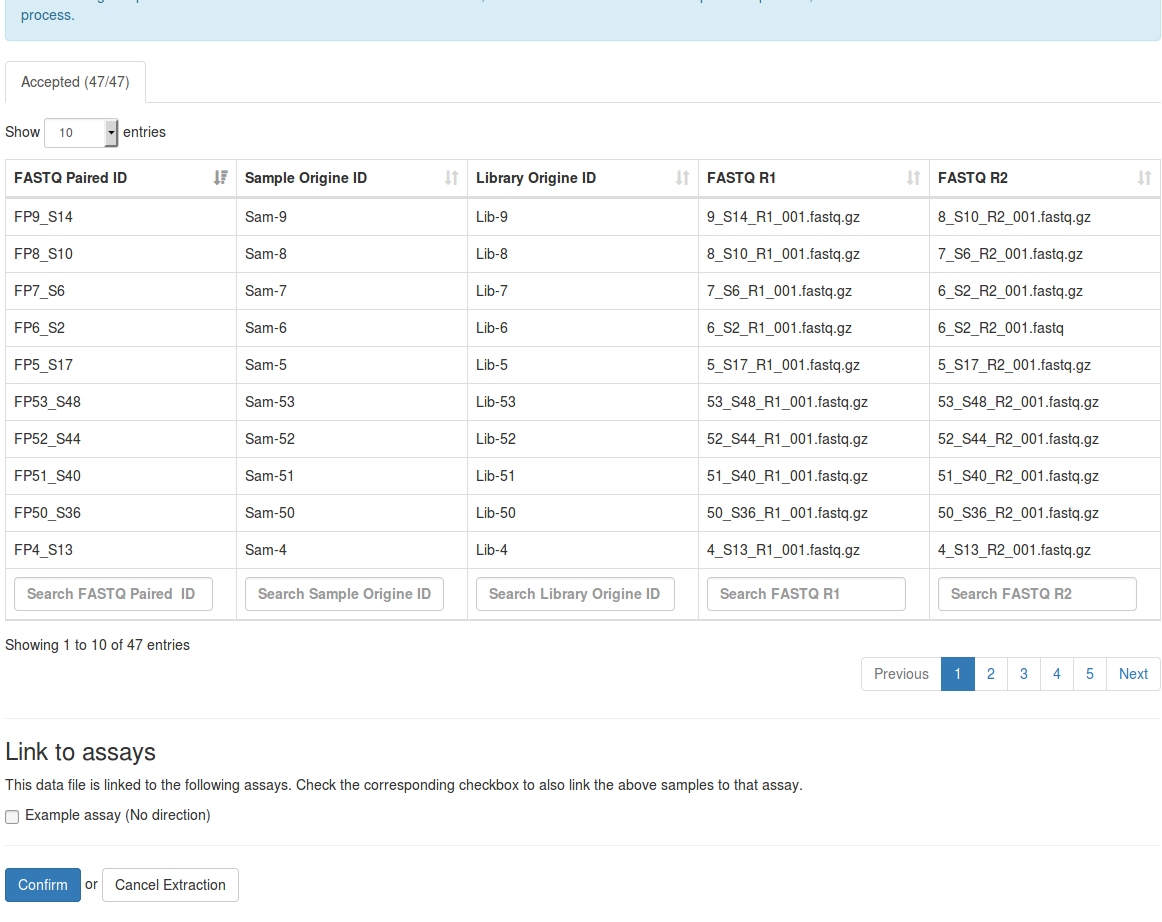
On this page you can review the samples that SEEK has extracted from the metadata spreadsheet. You can also opt to link the extracted samples to an assay in the “Link to assays” section. Only assays linked to the data file will appear here. By default, the extracted samples will only be linked to the data file.
If you spot a mistake, you can click “Cancel Extraction” to abandon the process. Later, after the sample metadata spreadsheet has been corrected in NeLS, you can re-import the spreadsheet by clicking the “Fetch sample metadata” on the previous page.
If everything looks correct, click “Confirm” to complete the process.